Guide To Flash / Install Firmware Android Lenovo K3 NOTE.
Flash / Install Firmware Android Lenovo K3 NOTE. (This guide just for Lenovo K3 NOTE) Guidebelajar on this guide will explain to you how to flashing android device on Lenovo K3 NOTE with easy and simple step. Flashing in android is the same way like fresh install on the windows PC, So by perform a flash on Android you will give a new performance like a new phone. One reason that you should perform a flash your android is because your android get bootloop or when you failed to install Stock ROM Mod.
Lenovo K3 NOTE comes with IPS capacitive touchscreen, LCD 5.5 Inches, Android OS, v5.0 (Lollipop) and supported with Mediatek MT6752 chipset, Octa-core 1.7 GHz Cortex-A53 CPU, GPU Mali-T760MP2, combined with 2 GB of RAM as their engine. And you can enjoy exciting 13 MP on main camera, and 5 MP on secondary camera.
Do you know what is bootloop, Ok.. now I will explain to you what si bootloop. Some people say that bootloop is a problem that occured on an android system which the android system could not start up going to the homescreen menu. And it's happened is automatically return to the initial state on the first time when you turn on the
Lenovo K3 NOTE. And the device will stop to display on the smartphone logo.
Now, follow the isntruction list bellow, do it with your own risk.
Prepare Flash Lenovo K3 NOTE.
- A computer with windows OS,
- Original USB Cable Lenovo K3 NOTE
- Firmware Lenovo K3 NOTE. Download
- SP Flash Tool .Download
- Lenovo Driver. download
- To ensure what is firmware used by your device, you can check by go to Setting ->About -> Software Information ->Build Number.
Flashing Lenovo K3 NOTE.
- At the first time,download the linked archive from above.
- Please make sure to unzip this archive.
- When you finished unzip this file You will now get a folder called “lenovo-k3-note-startkit”. In this folder you will find more archives. The archives
- Recovery.zip
- K50-T5_USR_ST1516.rar (you must unzip this file)
- You will find driver located in “AIO_LenovoUsbDriver_autorun_1.0.14_internal”,
- The stock ROM is located in “target_bin”
- And the SP Flash Tool is located in “AIO_Upgrade_Tools_v5.1436.00.000″
- Then remove your back case, battery, sim card and SD Card if installed
- Next, Connect your Lenovo K3 NOTE to Computer, while holding the power button and volume up. The PC will detect the new hardware, just ignore it.
- Then, release USB data cable from the PC.
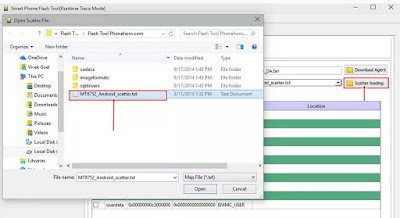
- Open SP flash tool software and click scatter load. find Lenovo K3 NOTE scatter storage location earlier.
- In the Scatter Loading field go to the folder where you extracted the Flash Tool and select target_bin
 |
| Flash / Install Firmware Lenovo K3 NOTE. |
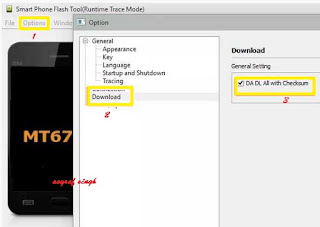
- Then you click options ->Download -> then check DA DL all with checksum.
 |
| Flash / Install Firmware Lenovo K3 NOTE. |
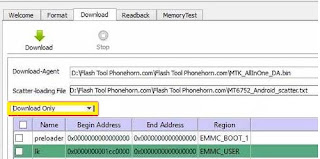
- On download tab, ensure you have selected download only option from dropdown menu, see below picture.
 |
| Flash / Install Firmware Lenovo K3 NOTE. |
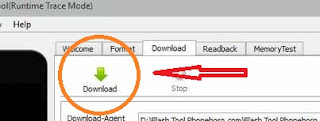
- Then, click download button on top right and connect your Lenovo K3 NOTE with USB cable in phone switch off position.
 |
| Flash / Install Firmware Lenovo K3 NOTE. |
- Process will run automatic, and you can see the red stripe showing download percentage at bellow
- When your process complete, you can see a green circle with tick mark.
 |
| Flash / Install Firmware Lenovo K3 NOTE. |
- Now disconnect your Lenovo K3 NOTE
- Intall you battery again.
- Then, start your Lenovo K3 NOTE. (remember, on the first booting it will take a long time to start)
- Success. enjoy
Video Guide.
ADS HERE !!!